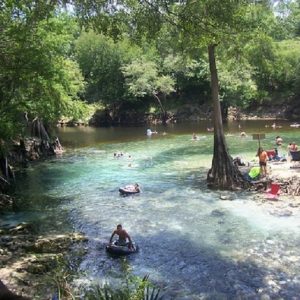
If we crafted our perfect hike it would include green trees, rushing rivers, endless mountain views, and bright blue lakes. And the Blue Lakes Trail in Southwest Colorado‘s San Juan Mountains checks off everything on that list!
This hike was at the top of our Colorado hiking bucket list and being able to hike it during our two months in the state required some patience and replanning, as we had to wait for snow to melt to be able to successfully hike the entire trail. But it was 100% worth the wait!
Blue Lakes easily became one of the most gorgeous hikes we have done in the United States, rivaling Glacier National Park at times with its San Juan Mountain peaks and THREE gatorade colored lakes.
And in this guide we’re sharing everything you need to know before attempting this hike including the road to the trailhead, parking, when to hike, the trail itself, and more!
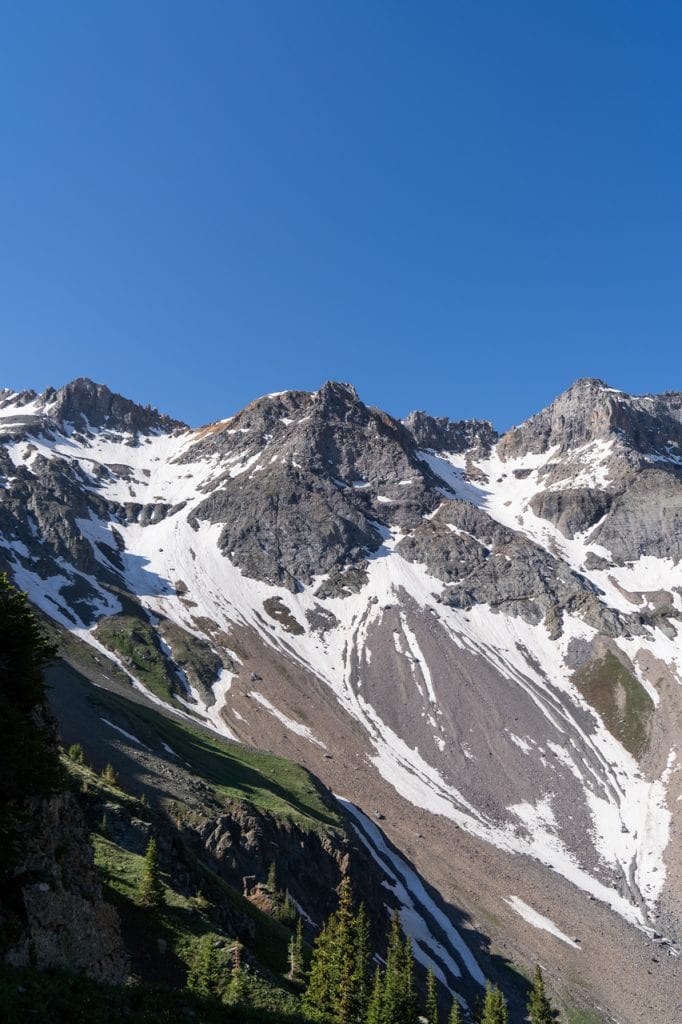
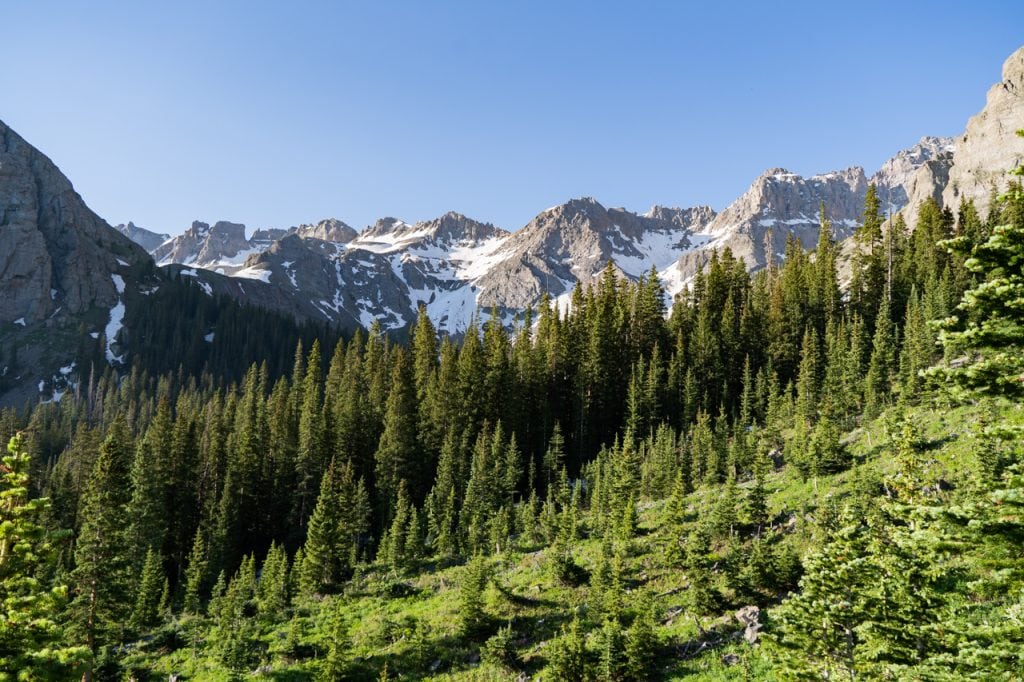
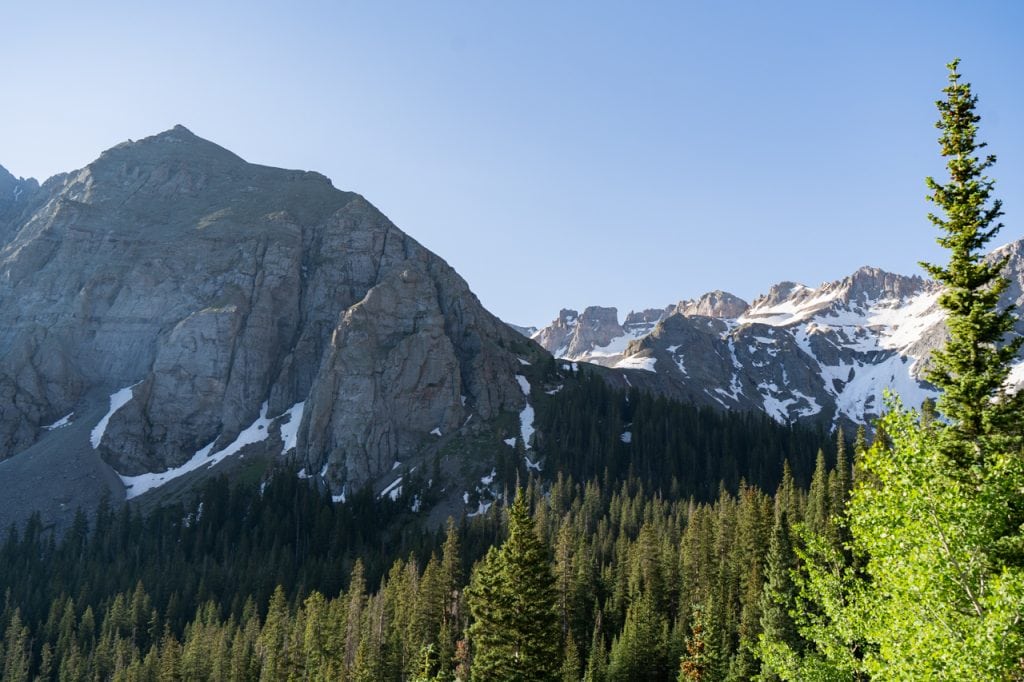
Many rate the Blue Lakes Trail as one of the top hikes in not only the San Juan Mountains, but Colorado as a whole, which is huge praise for a state that is packed with adventures. The hike features three turquoise green lakes that are surrounded by several 13,000+ foot mountain peaks, including Mt. Sneffels, Dallas Peak, and Gilpin Peak. Even without the lakes, the mountain views on this hike are jaw dropping on their own!
But like many trails in Colorado, this hike has become extra popular because of its beauty and its location to many vacation spots in the San Juan Mountains, so it can get very busy. And with increased foot traffic comes some negative side effects, like trash on the trails, parking issues, and harmful impacts to the terrain.
Contents
WHERE IS THE BLUE LAKES TRAIL?
The Blue Lakes Trail is nestled in the Mount Sneffels Wilderness in the San Juan Mountains, which is a mountain range in Southwest Colorado and is located close to Ouray, Ridgway, and Telluride.
The most popular and recommended way to do this hike is from the Blue Lakes Trailhead, which despite Google stating it is in Telluride, is actually accessed from the north from Ridgway via US 7. After turning off of US 62 onto US 7, the road quickly becomes a dirt road for the 9 miles until the trailhead parking.
After a few miles, the road gets pretty rough with large potholes. This road is a bit notorious and mentioned frequently on trail reports because of its roughness, but it isn’t too bad. While it is rough and you may need to go really slow, it is passable by most cars (we saw anything from sedans to Jeeps at the trailhead), but a high clearance vehicle would be best. Our van, which is higher clearance but not 4×4, made it just fine!
NOTE: There is another trail called Blue Lake (singular lake) that is actually in Telluride and people seem to mix up the names. The Blue Lakes Trail (plural lakes), which we are referencing in this guide, is a different hike from that one, although we hear Blue Lake is nice too and can confirm that the Bridal Veil Falls portion is gorgeous!
BLUE LAKES TRAIL STATS
Miles: 8.7 miles
Elevation: 2,509 feet
Reviews & Current Conditions
According to AllTrails, the hike is 8.7 miles with 2,509 feet of elevation gain. On paper, we thought this hike seemed moderate for the amount of average elevation gain per mile, but with a starting elevation of 9,500 feet and a steady incline as soon as you hit the trail, we found the hike to be pretty challenging, even after being in higher elevation for over a month at this point.
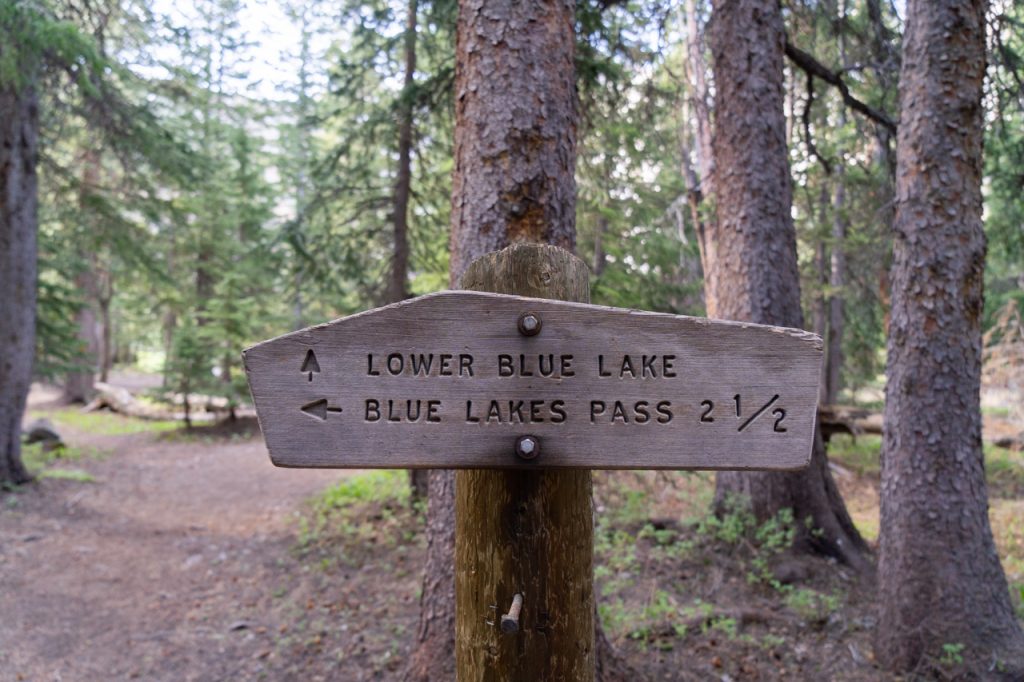
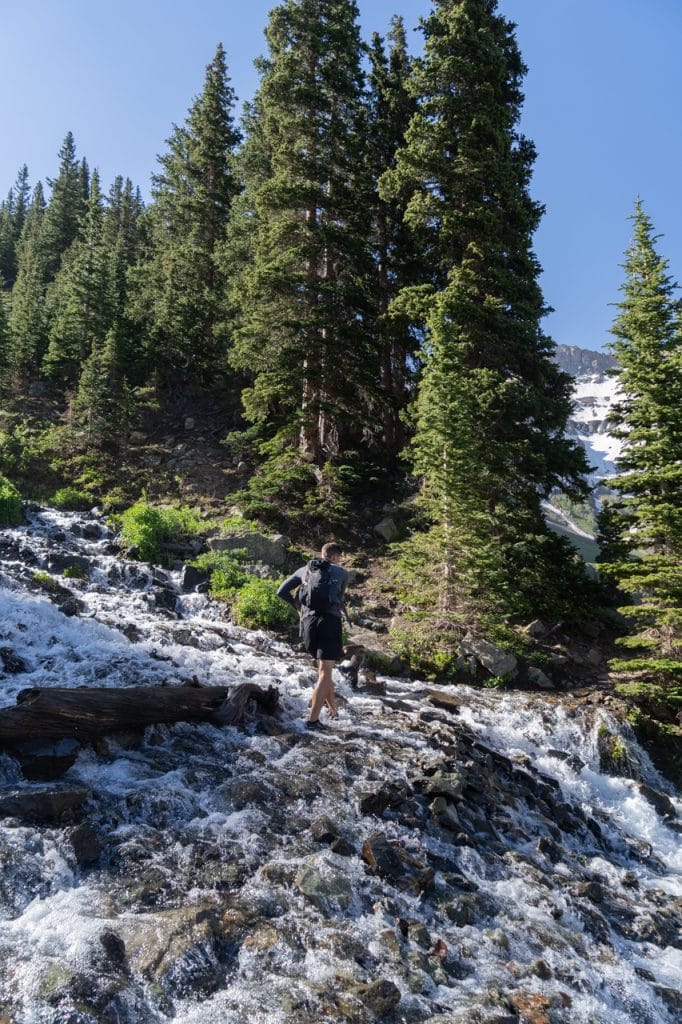
The first part of the hike goes through the forest, where you’ll hike alongside a rushing river and have some minor creek crossings, until you reach a valley that you’ll traverse through, which is where the mountain views really begin. After 3.2 miles, you’ll reach the first blue lake, with the second and third lakes about 1 mile after that.
Overall, the trail is very well maintained and easy to navigate. However, there are some water crossings and there was one area after leaving the first lake that confused us, which we will highlight more in the “our experience” section of this guide (and we show more closely in our YouTube video of this hike).
Including filming, photos, and snacks, the hike took us a total of 6.5 hours to complete, with 5.5 hours of that being our actual moving time. We suggest giving yourself plenty of time to enjoy this trail, as you’ll want to soak in all of the views!
Want to get 30% off an AllTrails+ membership? Click this link or use our code aplusk30 (you must redeem this code on the website, not the app)!
We use AllTrails+ on every single hike and it is the most helpful hiking tool out there! Some of the features we love are offline maps (so we can navigate even without cell service), wrong-turn alerts, and its 3D maps feature, so we can get a feel for trails before we hike.
WHEN TO HIKE THE BLUE LAKES TRAIL

EARLY SUMMER TO FALL IS BEST
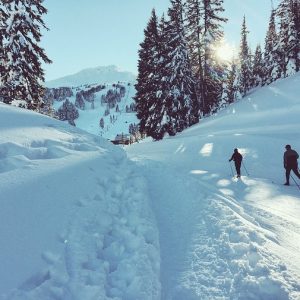
The best time to hike the Blue Lakes Trail is in the early summer to early fall, when the trail is mostly clear of snow and ice.
The first snow tends to start falling in October and the last of it falls in May and once the snow starts falling and the trail gets covered in snow, this hike is much less accessible or not accessible at all.
We hiked this trail on June 20, the first day of summer, and the trail was in great condition. However, during the weeks leading up to our hike, many hikers stated that they could not get past the first lake due to snow or between the second and third lake. So we had put off this hike for a couple weeks and hung out in the area eagerly reading trail reports to see if the ice and snow had melted off to be able to do the entire hike.
And we lucked out and got the perfect day and conditions for it! When we did the hike there were some muddy spots, rushing water crossings, and some leftover snow heading toward the last lake, but it was mostly clear.
One thing to note is that snow levels vary every year. Just because we couldn’t hike this trail until June 20th doesn’t mean that it may not be clearer sooner, but if you’re planning a trip to Colorado and really want to do this hike, we’d shoot for July to be safe.
GO ON A WEEKDAY
Beyond snow levels, something else to keep in mind when hiking this trail is the day of the week and time of day. We hiked this trail on a Sunday, but since we were on the earlier side of the summer tourist season, it wasn’t as crazy busy as we expected, although still busy. We’d suggest doing this hike on a weekday if you can to eliminate some crowds, but don’t expect solitude on any day of the week.
START EARLY (AND AVOID STORMS!)
It’s also very important to start this hike early, not only to beat the crowds, but also to beat afternoon thunderstorms. We started right as the sun was coming up and didn’t encounter many people on the hike out to the lakes, but it was a lot busier on the way back.
However, more importantly, Colorado is known for afternoon thunderstorms in the summer, so you will want to ensure you’re back below the treeline (or back at your car) by the early afternoon in case it starts to storm. Here is a helpful article with tips on what to do if you find yourself on a trail during a storm.
WHAT TO BRING ON THE BLUE LAKES TRAIL
To see everything we recommend packing for hikes, check out our hiking gear, where we share everything we bring with us when we hike, including the 10 essentials. But for this specific hike, we have a few items we really want to stress bringing with you.
HIKING SHOES
This is a rugged hike with lots of elevation so a good, sturdy shoe is a must. We almost always wear our Lowa Renegades (Kathryn) and Altra Superiors (Adam) and on this hike, the waterproof Lowa Renegades came in clutch with some water crossings.
LAYERS
Layers are a must at higher elevation, as the mornings and evenings can be pretty chilly.
WATER
Because of the higher altitude and the warmer summer days, make sure to bring and drink plenty of water. The air is super dry and our throats and noses were not fans!
We love our 3L Camelbak bladder for hikes because it stores a ton of water and it’s easy to drink from while moving. If you are bringing less water, we highly suggest packing a filtration system as well so you can fill up on the trail (there are many water sources). We use the Sawyer Water Filtration System and it works pretty well and packs up pretty small!
ALLTRAILS MAP
We’d highly recommend downloading the AllTrails map before you go. While the trail is easy to follow, we like to use the map to track our progress along the trail. You will need an AllTrails+ membership to download maps, which is $35.99 a year (but you can get 30% off with our code: aplusk30) and so worth it!
SPIKES
Depending on how early or late in the season you hike, you might encounter snow or ice on the trail. Spikes are extremely helpful in these situations and we love our Kahtoola MICROspikes.
THINGS TO KNOW BEFORE HIKING THE BLUE LAKES TRAIL
Before hitting the trail, here are a few more things to know to make sure you have a safe and enjoyable hike.
KNOW THE RULES
This hike is located in the Mount Sneffels Wilderness and there are specific rules for recreating in this area. This PDF lists the majority of them, so please read through these beforehand to ensure you’re recreating responsibly. One rule that is not stated here, but applies to all wilderness areas, is that drones are not allowed.
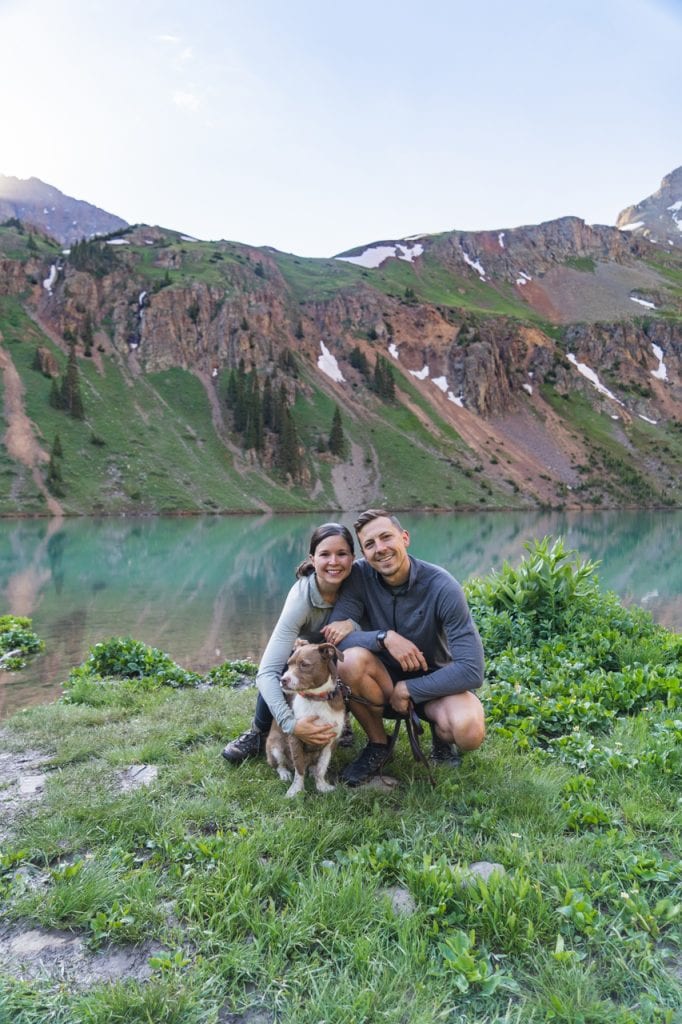
DOGS ARE ALLOWED
The Blue Lakes Trail is dog friendly, but dogs must be kept on a leash. Please pack out their waste!
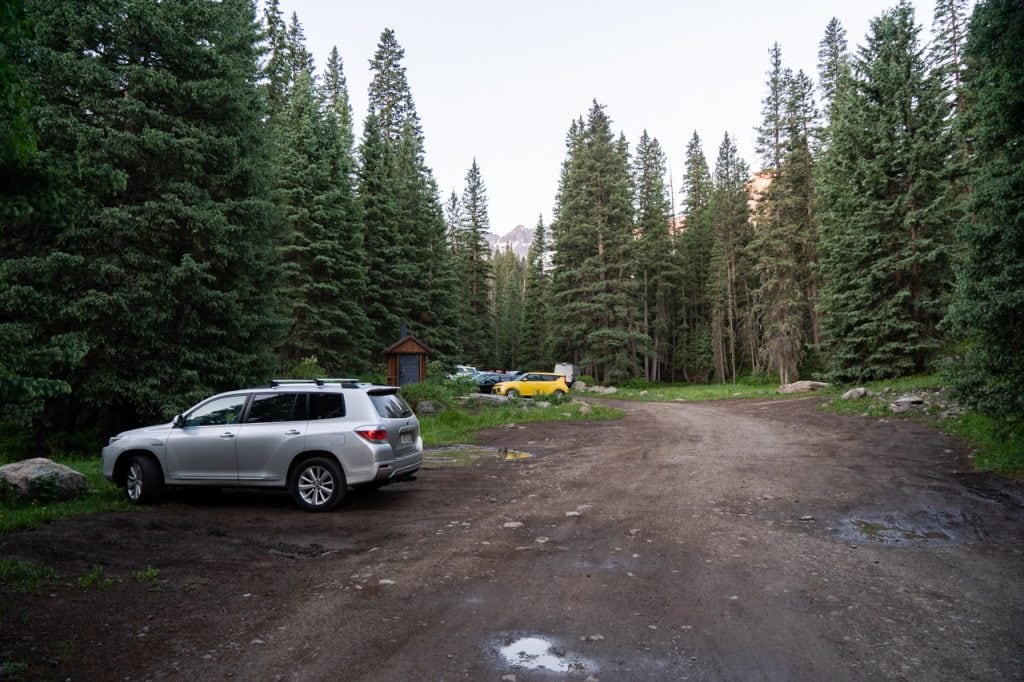
PARKING (+ OVERNIGHT CAMPING BY THE TRAILHEAD)
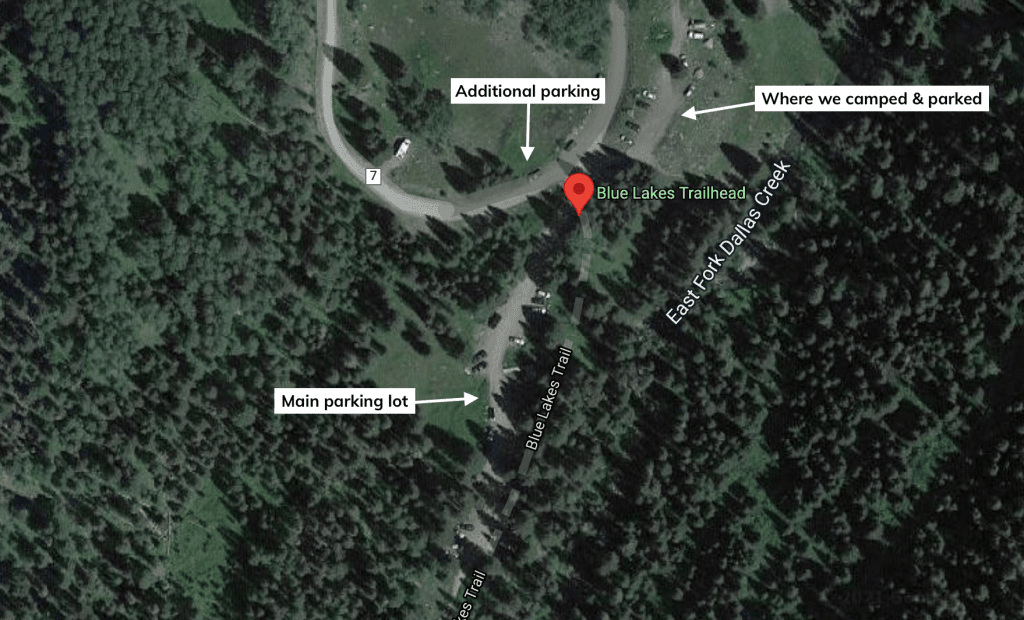
The trail has a parking area, which is a pretty good size, but fills up quickly due to the popularity of the hike. However, there are a couple other areas that you can park in, which we have marked above. Wherever you park, make sure that you are not blocking others and that you’re parking in areas intended for parking. We try to stick to gravel and dirt areas when parking to not harm any fragile terrain.
When we arrived at the trailhead on a late Saturday afternoon there were definitely many spots available, but due to the size of our van, we couldn’t really fit into any of the spots at the actual trailhead, so we parked just down the road in a more open area and slept for the night (marked above). There were a couple other campers here as well, including one in a tent.
Since the trailhead is on National Forest land, you can camp for free in this area. Just make sure to use areas that have been used before instead of damaging more land to create a new camping area. There are more camping areas on the way into the trailhead, which were a lot more spacious and a lot busier with campers, but we wanted to be right at the trailhead so we could just roll out of bed and hit the trail.
RESTROOMS
There is a toilet at the trailhead for you to use. If you decide to use the restroom on the trail, please pack out any toilet paper and make sure to use a trowel to dig a hole for human waste.
FEES & PERMITS
There are no fees to park or access the Blue Lakes Trail…woo! But there is a trail register book to sign when starting the hike, which is helpful for rangers to know who is on the trail.
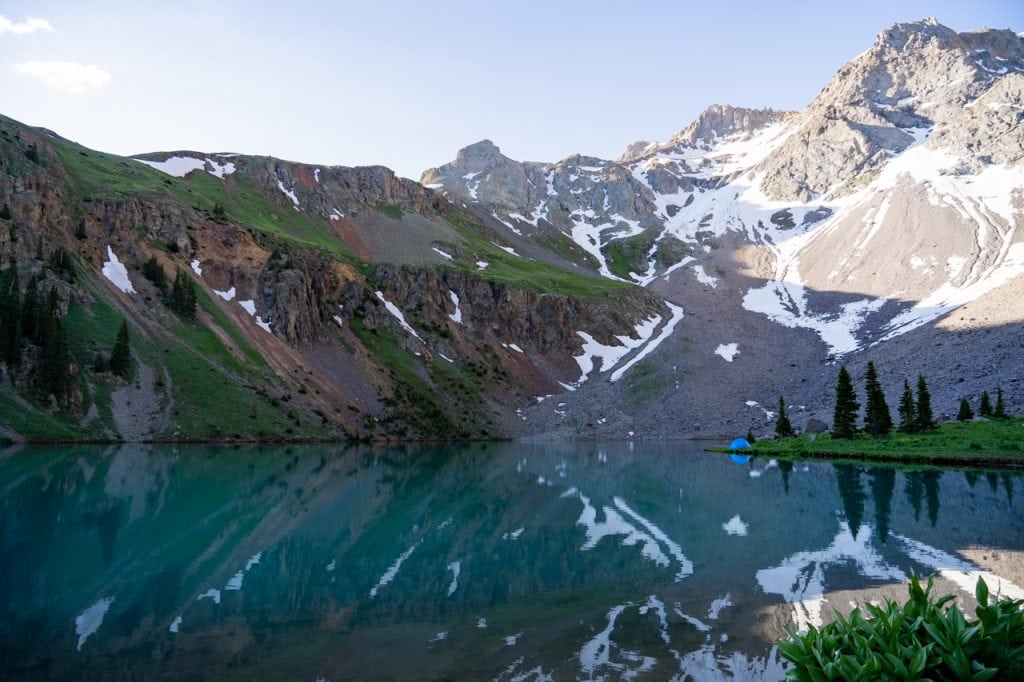
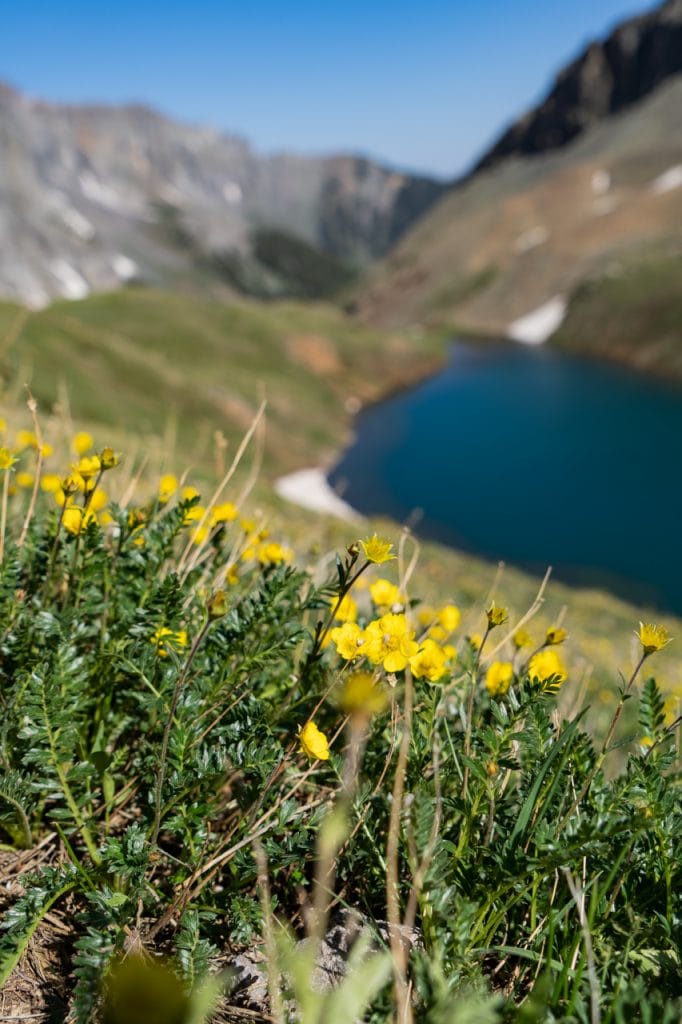
CAMPING AT THE LAKE
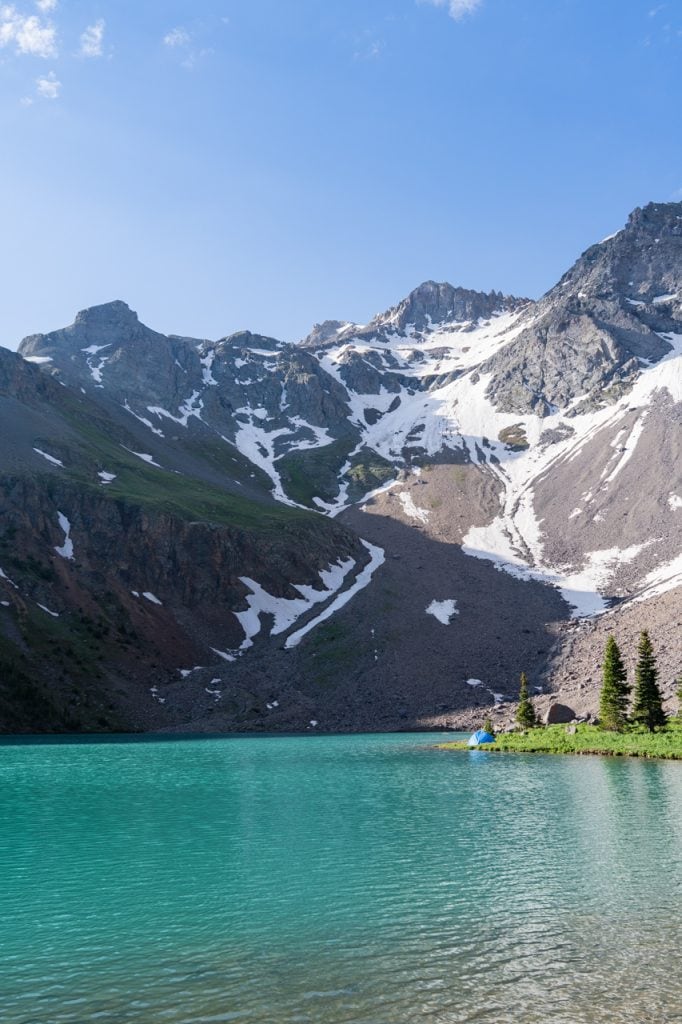
You can make this trip an overnight adventure, but please follow the rules and set up camp 100 feet from any water source, including the beautiful Blue Lakes. We unfortunately saw someone with a pitched tent directly on the water’s edge of the lower lake (pictured above), which is prohibited.
ALTITUDE
This hike ranges from 9,500 feet to 11,764 feet above sea level and if you’re visiting from a less mountainous state, you may want to acclimate to the altitude for a few days to avoid getting altitude sickness. Even after spending a month at higher elevations before hiking this trail, we found ourselves breathing really heavily.
OUR EXPERIENCE HIKING THE BLUE LAKES TRAIL
After spending a Saturday exploring Telluride (highly recommended), we headed northeast to Ridgway to begin the first adventure of our hike to Blue Lakes: getting to the trailhead.
As we mentioned above, this road is known for being pretty rough, but in our opinion it wasn’t too bad, although it definitely is its roughest towards the end, with larger potholes. We have been on many washboardy and bumpy roads though, so we may just be used to it at this point! One issue we did have at the beginning of the road though is that Google Maps tried to send us down little private drives from US 7. So if it does this for you, just stay on the main road instead!
After spending a night sleeping right by the trailhead, we woke up bright and early Sunday to try to hit the trail right as it was somewhat light out in order to beat the crowds. We had heard how insanely busy this trail gets, so we were a bit nervous that the beauty of the scenery would be overshadowed by people (thankfully it wasn’t).
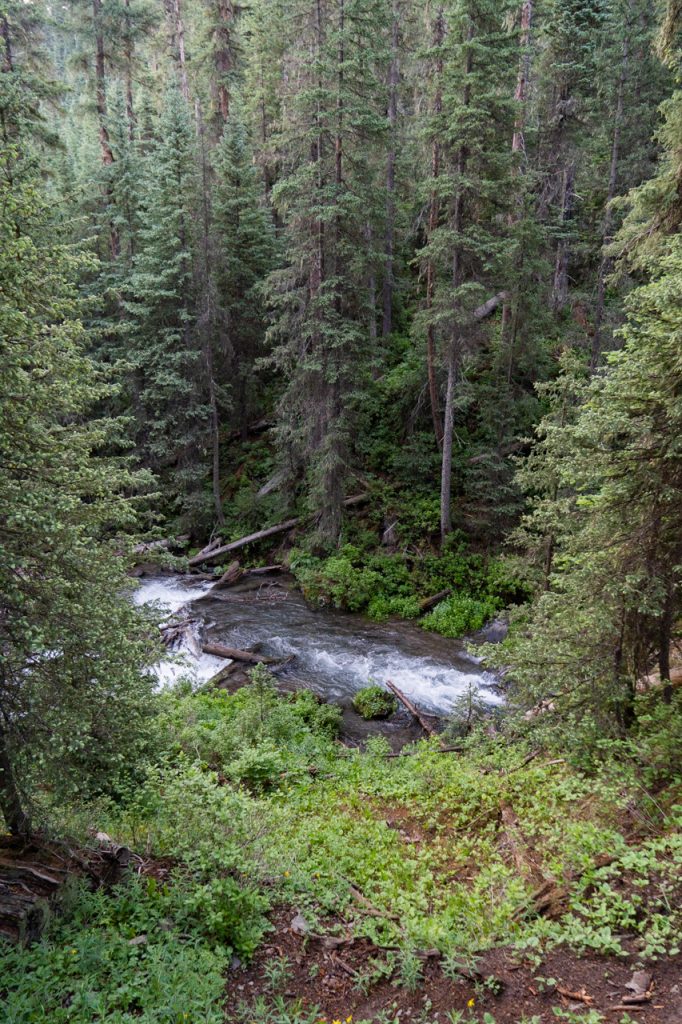
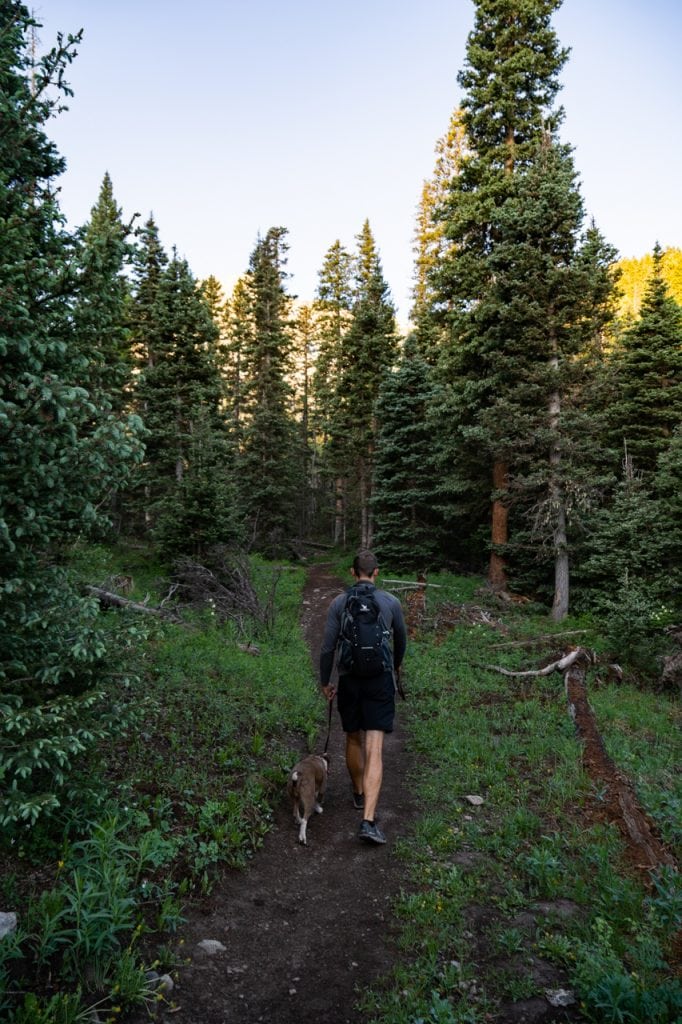
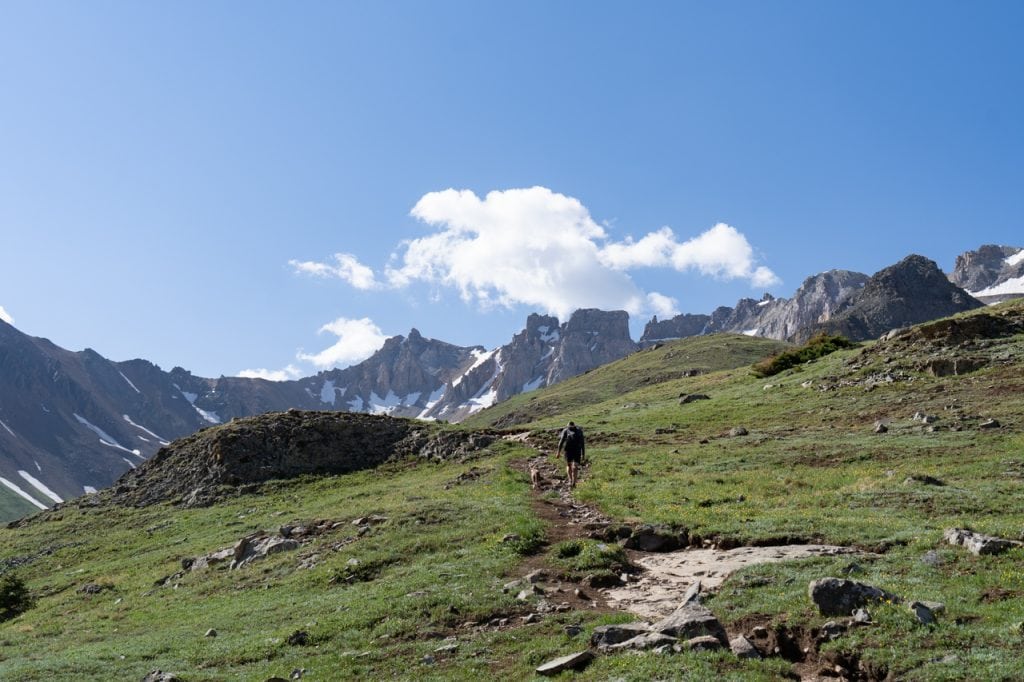
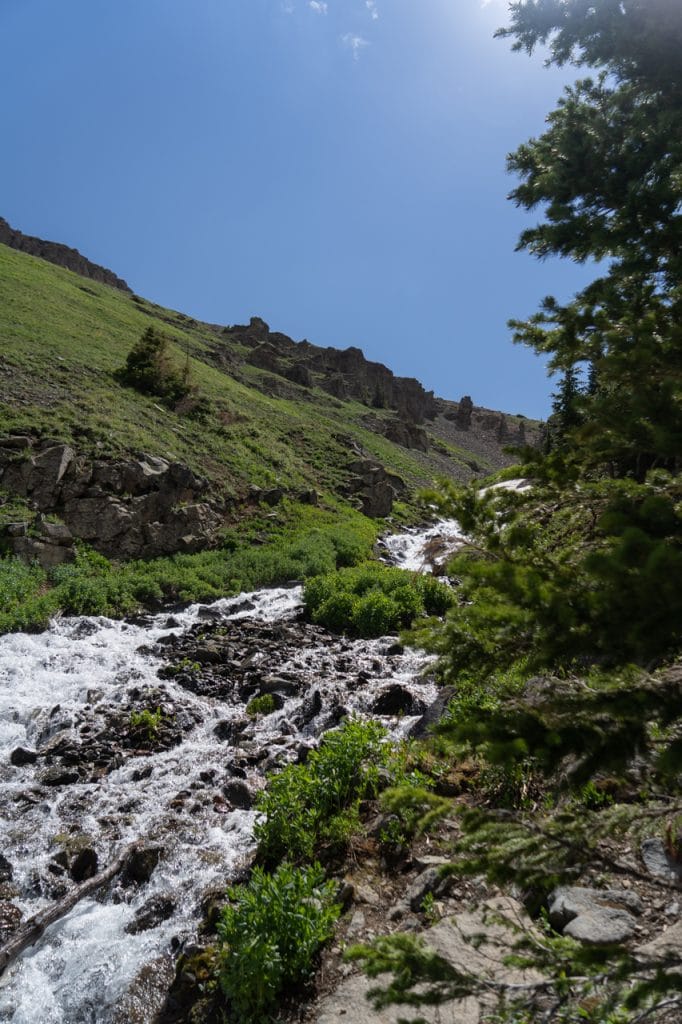
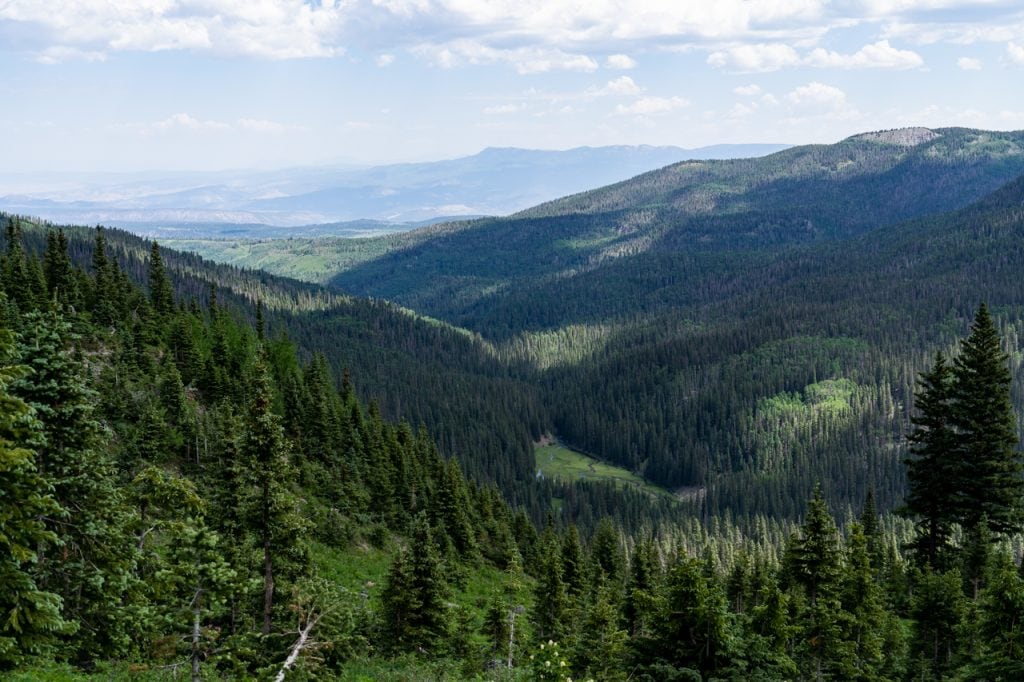
The first mile or so of the trail is a steady climb through the forest. The trail was super easy to follow and well maintained, but there were some fallen trees we had to climb over or under and a couple creek crossings. But we’re not going to lie, this hike kicked our butts a bit right from the beginning and we were huffing and puffing much more than expected.
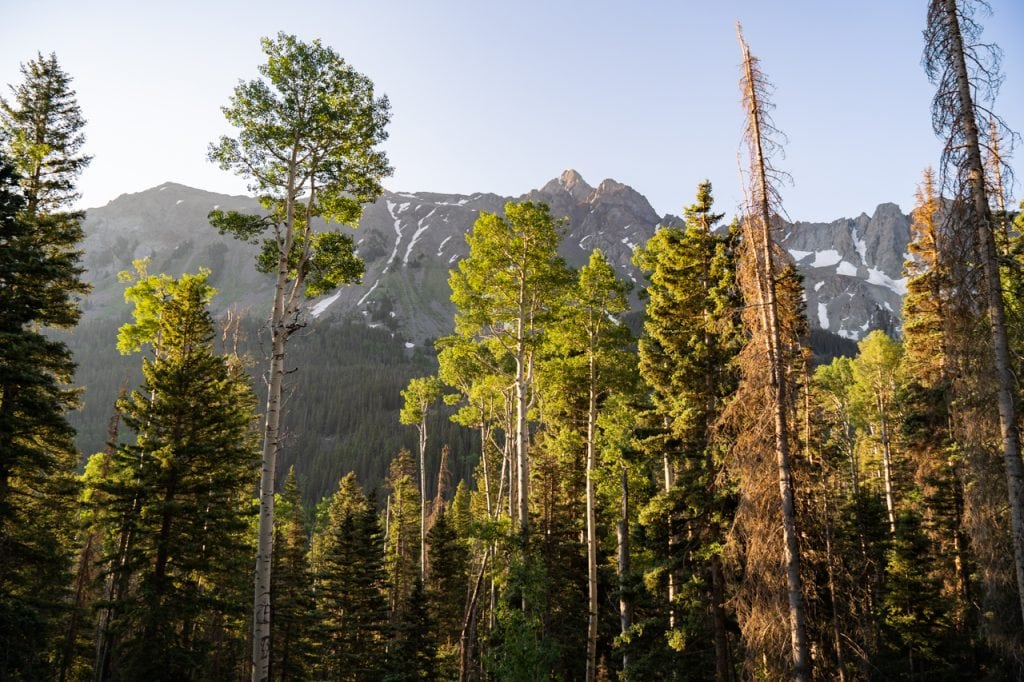
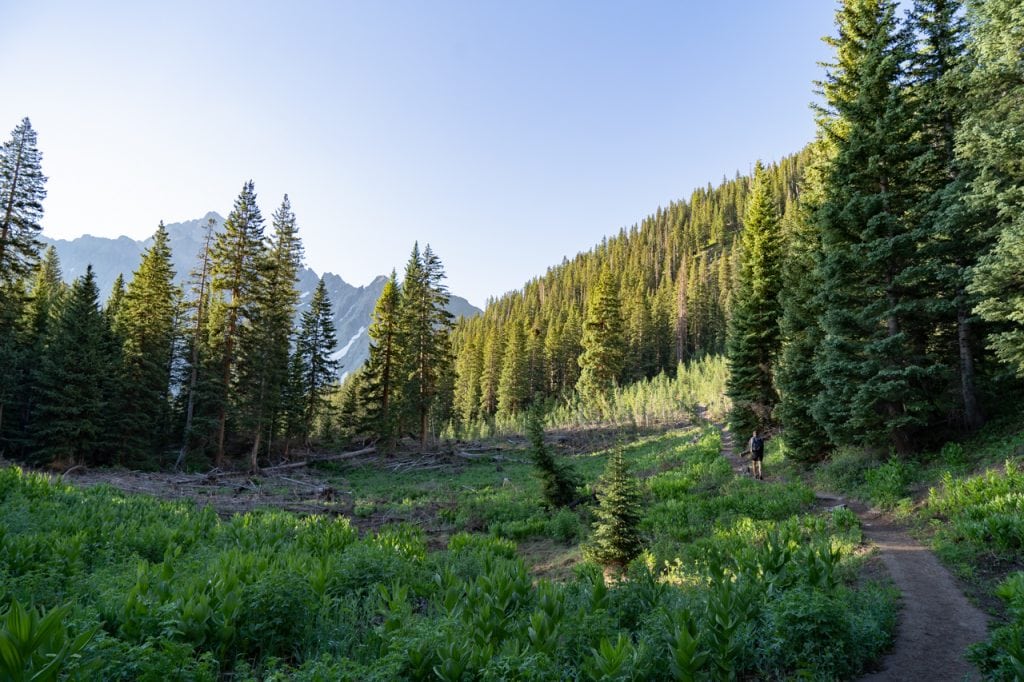
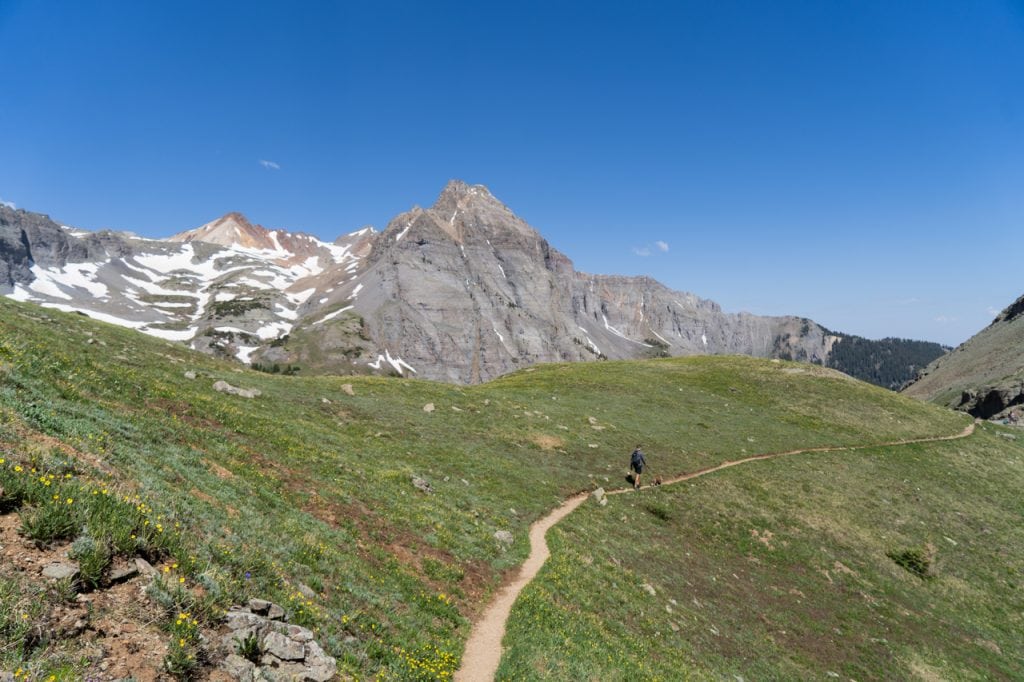
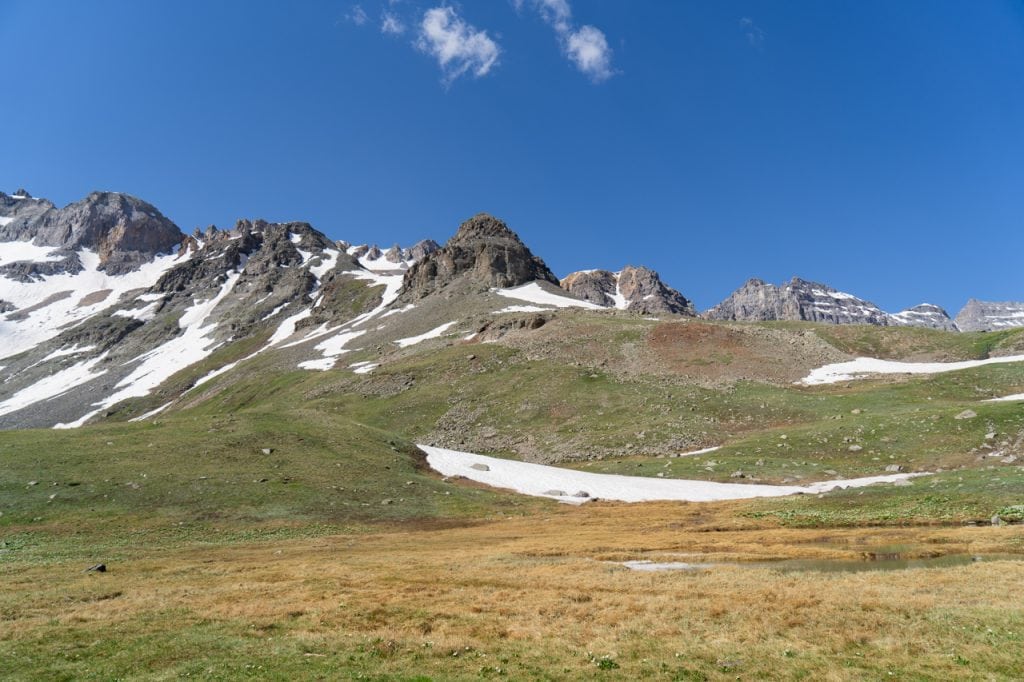
After being in the forest for a bit, we entered more of a valley, where the views opened up more and we could finally see a clearer view of some of the mountains that we would later be right up against while at the lakes. As we got closer and closer the mountain views got better and better!
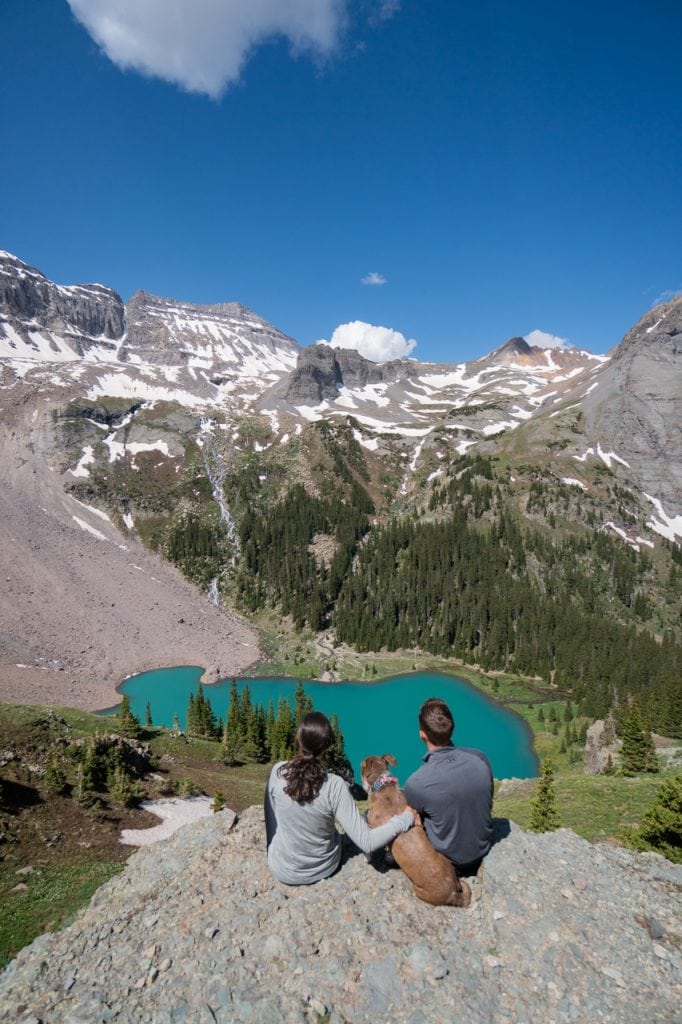
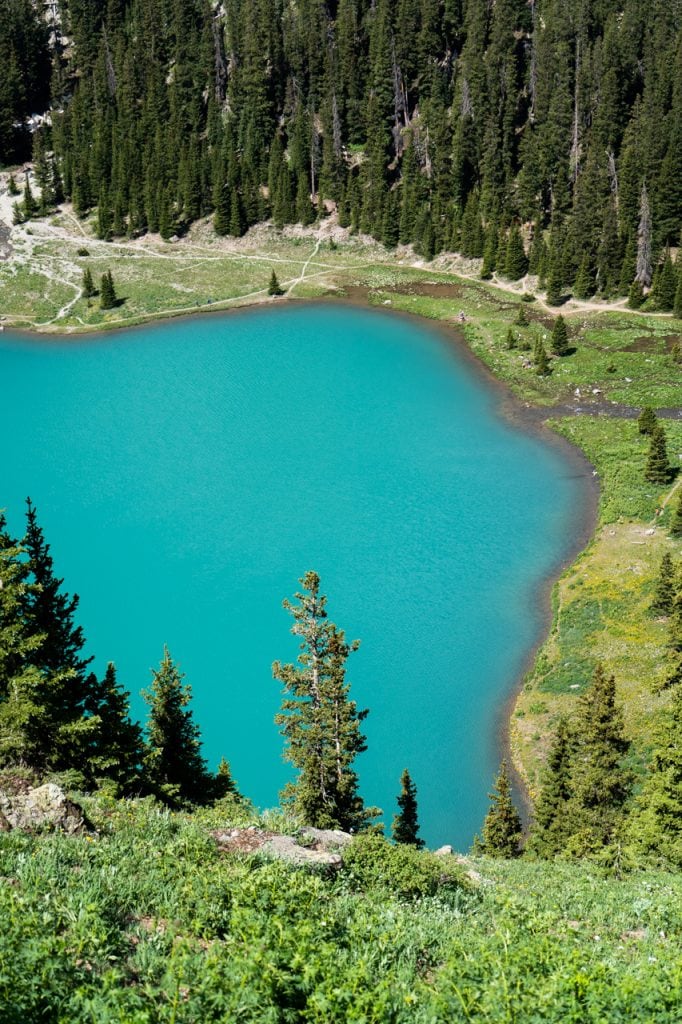
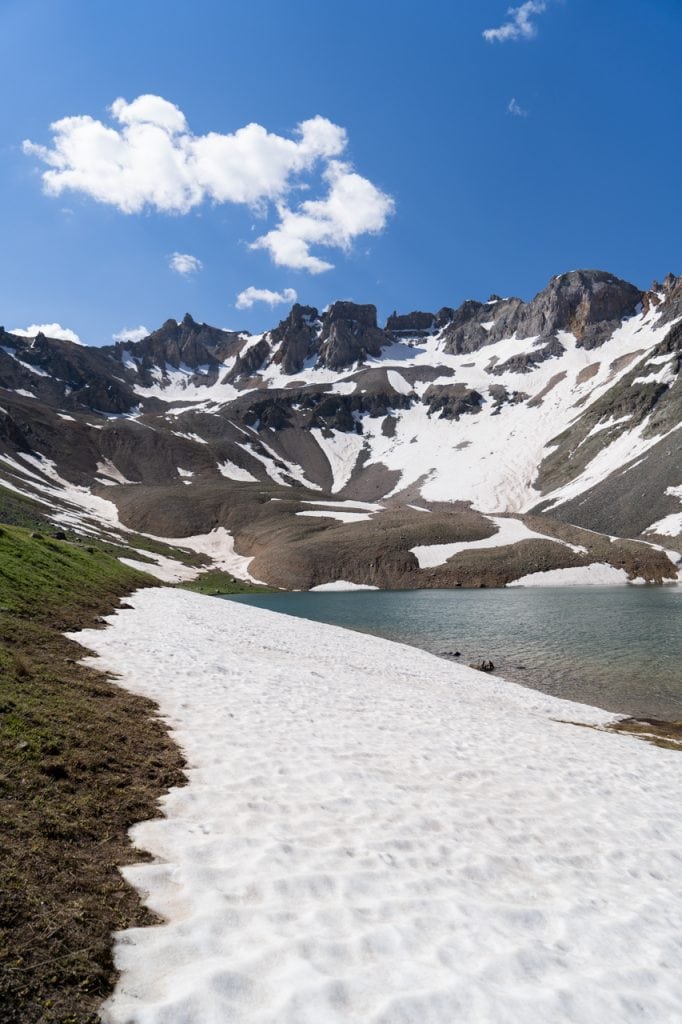
Around 3.2 miles in we reached the Lower Blue Lake. This is the bluest and most iconic of the three lakes, with an insane gatorade blue color, just like what we had seen at Glacier National Park. When we arrived, the sun had yet to pop over the tall peaks, so the lake wasn’t super blue, but as soon as the sun hit it, it transformed into the iconic color it is known for.
This first lake is a great spot to recharge before continuing the hike. There are a few areas where you can take your pack off, have a bite to eat, and enjoy the view. When you’re rested and ready to get back on the trail you will backtrack towards the trail you entered on to continue on.
This is where things got confusing for us. We used AllTrails to backtrack to find the trail to continue, but it wanted us to cross a pretty rushing river and we didn’t feel super comfortable doing so in this spot. So we headed back to the lake and crossed right by the lake, where it was still rushing a bit, but the water was shallower, so we got slightly less wet and it felt safer overall. However, this water is ICE COLD! So be prepared for a freezing few seconds as you cross.
Once we made it across the river, we were able to get back onto the main trail to continue to the other lakes. Shortly after we got onto the trail to the second and third lakes, we walked across a rocky section before coming across another water crossing. Unlike the crossing at the lake, which was flat, this crossing almost feels like crossing a waterfall, with a bit more of an angle to it than a river. There were some logs to use for assistance, but this part did make me (Kathryn) a bit nervous, as water crossings, especially when the water is moving quickly, are not my favorite.
But once you get past this part, you’re treated to the BEST views on the hike! While the first lake is the most beautiful of the lakes from a color perspective, the view on the trail to the second and third lakes is even better, with views of the first lake below, as well as the San Juan Mountains all around. It is straight out of a postcard!
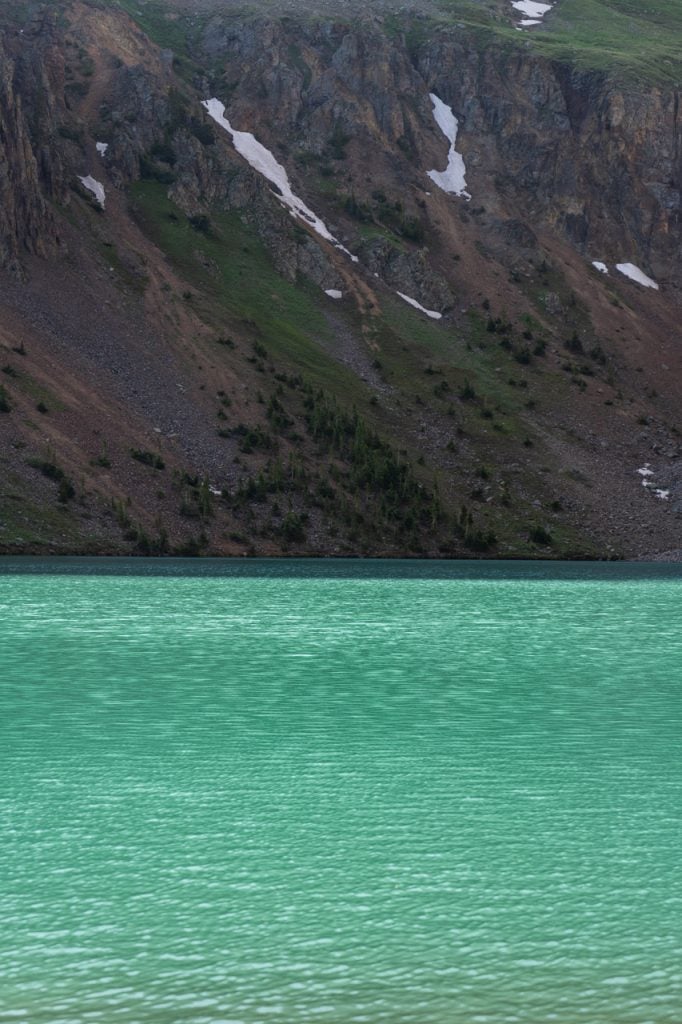
There are a couple more open spots to soak up this view before continuing to the second and third lakes. The second lake will be on your left and is tucked below a mountain peak and while it isn’t as milky blue as the first lake, it’s still VERY blue and gorgeous.
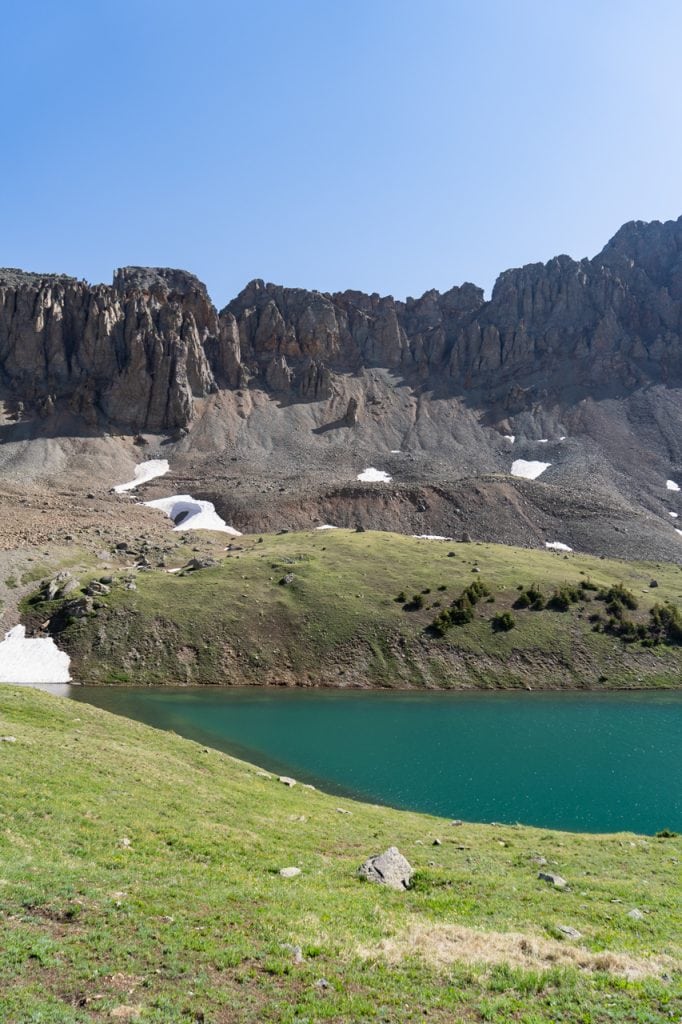
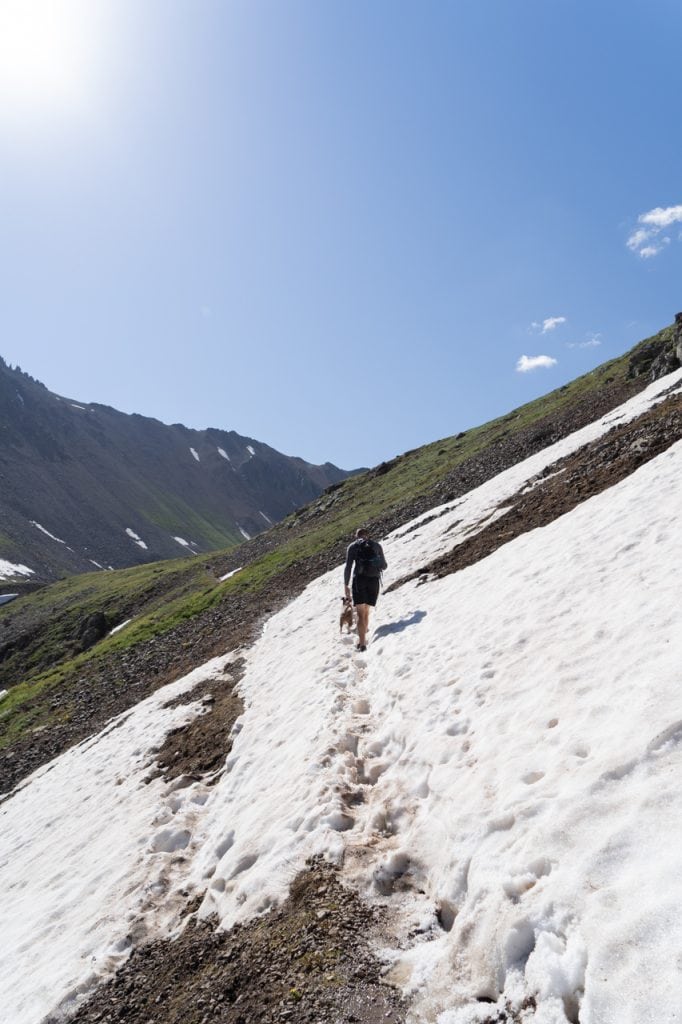

Between this second lake and the third there was a small section of trail that goes across a slope. This spot is more narrow and for us, was still partially covered in snow, which made it slightly tricky as it was slippery and one slip and you may slide down a rocky slope. This is the area that we believe is impassable if it is too snowy, but we were able to safely make it across by going slow.
Shortly after this, we reached the third lake, which has a gorgeous mountain backdrop right behind it. The views of the jagged, unique mountain peaks from the third lake were so incredible and we couldn’t stop gushing over how beautiful this hike was. It truly is one of the best we have done in the United States!

The third lake is the end of the hike to Blue Lakes, but if you’re feeling ambitious, you can continue on the trail to summit Mount Sneffels, which is one of Colorado’s 14ers at 14,157 feet. We hear this is a pretty challenging hike, with some technical rock scrambles, so only attempt this if you’re a very experienced hiker. Summiting Mount Sneffels will make your total hike around 13 miles and 5,501 feet of elevation gain.
We had another 14er in mind to conquer, so we turned around here and headed back down the trail. The trail was definitely a lot busier at this point, especially being a weekend, so we booked it back as fast as we could.
Once finishing this hike and surviving the rough road back to the highway, we highly recommend stopping in Ridgway, which is a super cute town, and grabbing tacos at GNAR. Their unique tacos are the perfect way to celebrate the end of this epic hike!